Monday 6 July 2015

How to clear Internet Explorer history with a batch file - in just THREE STEPS!!

Hey guys, welcome back to Gav's Tips. Sorry I haven't been really posting frequently because I've been pretty busy for the last month or so. Anyway, in this post, I'm going to show you how to clear your Internet Explorer history with a batch file. This will work on Internet Explorer 4.0 all the way to IE 11 and maybe Microsoft Edge. Here is what you do:

Method:

Step 1: Make sure all Internet Explorer windows are closed before proceeding. This isn't really that important, but it would be a good thing to do. Also people running Windows 8 or 8.1 will have to force quit Internet Explorer (if you're using Microsoft's 'Metro' version) from Task Manager like so:


If you're using this version of IE,
then you're going to need to force close it by right-clicking and selecting 'End Task'


Step 2:
Now it's time to make your batch file. Obviously to do this we need Notepad or Wordpad. Microsoft Word and OpenOffice are not suitable for this. Once you have opened your text editor, copy and paste this text.


RunDll32.exe InetCpl.cpl,ClearMyTracksByProcess 4351

Step 3:
Now save your batch file. You can call it something like 'cleariehistory' or something similar. Just make sure when making batch files that the file name ALWAYS ends with '*.bat'


Simple as that! And the good thing about this is that you don't even need to be an admin or run it as admin for it to work. Thanks for reading, hope you learnt something and please follow my blog for more helpful tips like these!

Peace out!


Thursday 28 May 2015

How to install Windows 7 as a virtual machine using VMware Workstation

Want to run Windows 7 but don't want to install it over your other version of Windows? No problems! I'll show you how!

First you need to install VMware Workstation (or Player) which you can do here:
VMware Workstation (trial version): Link
VMware Player (free): Link

I'm using VMware Workstation so the process may differ slightly from VMware Player.

Method:

Step 1:
With VMware installed, run it and click Create a Virtual Machine. A wizard will pop up.


Step 2:
Choose Custom (advanced) and click next.

Step 3:
It will now ask you what virtual machine hardware compatibility it should be. Leave this as Workstation 11.0 and click next.


Step 4:
Now it will ask for your iso file. That can be downloaded here. (Windows 7 Ultimate 32 and 64 bit.) However, if you have a Windows 7 installer disc that can be used also.


Step 5:
Now it will want your Windows 7 Ultimate product key, what version of Windows 7 to install, (in this case Ultimate) and your account details.


Step 6: 
Now click next, and now you will name your VM.

Step 7:
Select EFI and click next.

Step 8:
Here you choose how many processors Windows 7 will have. Leave it as it is and click next.

Step 9:
Here you choose the memory your VM will get. I'm giving it 4GB (4096 MB) because I have an 8GB pc.


Step 10:
Select Use Bridged Networking and click next.

Step 11:
Click next 2 times. Now you will be taken to the virtual hard disk page. Click next. Now here is where you specify how much hard drive space your VM will use. I'm going for 40GB, but you can do more or less as you please. Note that Windows 7 requires a minimum of 16GB to install.


Step 12:
Click next.

Now you are finished! Click next again and your VM will power on and then Windows 7 will install. Thanks for reading this and I hope that this post helped you! Don't forget to subscribe to this blog for more helpful tips and tricks!

Peace out! :)


How to get quick power shortcuts on your taskbar and desktop - no programs needed!

Like Windows 8 but find it annoying to go to Start then the power button then shut down? I'll show you how to get quick shortcuts on your taskbar and desktop!

Method:

Step 1:
On your desktop, right-click and select New then Shortcut.


Step 2:
Now the Add Shortcut wizard will appear. Type in the following:

C:\Windows\System32\shutdown.exe -s -t 00 (This will shut down your computer)


Step 3:
Now you can call it whatever you want. Something along the lines of Shut down would be good.


Step 4:
Once the shortcut is created, right click and choose Properties.


Step 5: Click Change Icon. It will say that the shortcut contains no icons, click OK and then select the Shutdown icon.


Step 6:
Once the Shutdown icon is highlighted in blue, click OK then OK.

Step 7:
Now for a restart shortcut. Do the same as before, but on the first step type in this:

C:\Windows\System32\shutdown.exe -r -t 00

Step 8:
Now right-click on the icon, Properties, Change Icon>OK. But the only problem is that there is no Restart icon. You can download a restart icon here.

Step 9:
Simply change the icon as before, but browse to the location of the icons that you downloaded. (Make sure you have unzipped them.)

Step 10:
Now that is your restart shortcut done. Last but not least, the sign out shortcut. This one is optional and you don't have to have it, but you can if you like.

Step 11:
Same process as before, but this time the code is:

C:\Windows\System32\shutdown.exe -L -t 00

And that is how you get quick power shortcuts on your desktop! To pin to your taskbar, right-click on the shortcut and click 'Pin to taskbar'. Thanks for reading and I hope this tutorial has helped you! Don't forget to follow this blog for more helpful tutorials!


How to get a Windows 7 start menu - On Windows 8!

Like Windows 8 but don't like the Start screen and want to get back to a more familiar Windows 7 start menu? I'll show you how!

Want to get rid of this?


Method:
Step 1:
Right-click on your taskbar and click on properties.


Step 2:
Click the navigation tab and then click When I sign in or close all applications on the screen, go to the desktop instead of Start and then click Apply and then close. This will give Windows 8 a more Windows 7 feel.


Step 3: Open your web browser and search up, "Classic Shell download" (without the quotes). Now click the first link.


Step 4: Download it and run the installer. If prompted click 'Yes'.

Step 5: Now you will notice that not much has changed. The Start button has stayed the same, the taskbar has stayed the same. But click on the Start button, and look! It is now a Windows 7 looking Start menu. The good thing is, the functionality is much of the same as Windows 7's Start menu.


And that, readers, is how you get a Windows 7 start menu on Windows 8/8.1! Thanks for reading and I hope this post has helped you and don't forget to follow my blog!


Peace out! :)

Tuesday 26 May 2015

How to clean your PC using a simple batch file - no programs required!


Ever needed to clean your PC but don't want to install programs because your worried they have viruses? No problems! Today I'm going to show you how to clean your computer just by using a .bat file!

Method
Step 1:
Go to Start and type in notepad.


Step 2:
Once Notepad is open, copy this code into it.
@echo off
del /s /f /q c:\windows\temp\*.*
rd /s /q c:\windows\temp
md c:\windows\temp
del /s /f /q C:\WINDOWS\Prefetch
del /s /f /q %temp%\*.*
rd /s /q %temp%
md %temp%
deltree /y c:\windows\tempor~1
deltree /y c:\windows\temp
deltree /y c:\windows\tmp
deltree /y c:\windows\ff*.tmp
deltree /y c:\windows\history
deltree /y c:\windows\cookies
deltree /y c:\windows\recent
deltree /y c:\windows\spool\printers
del c:\WIN386.SWP

cls 


Step 3:
Now save your file. You can save it wherever you want, you can call it whatever you want, but MAKE SURE IT ENDS IN .bat!!! Otherwise it won't work. See below:


Step 4:
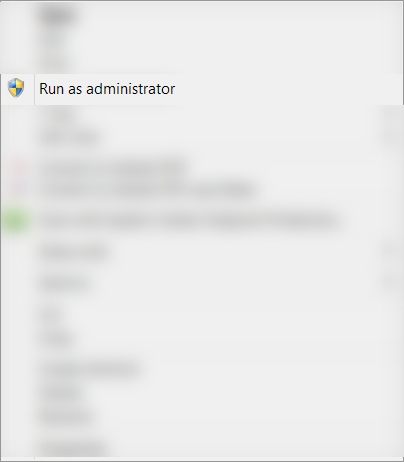
Now simply browse to the location that you saved it and right click on it and select Run as Administrator. Only users of Windows Vista - Windows 8.1 have to do this step. Windows XP users and earlier don't.


And now you're done! A black window will pop up for a second, then it will quickly close. The good thing is, no restarts are needed! I hope that this tutorial helped you a little bit and don't forget to subscribe to my blog for more helpful tips like these!

Peace out! :)